Linksys Router Bridge Mode Setup: What You Should Know?
Want to set up your Linksys router in bridge mode? Well, we can assist you with this. But FYI, not all Linksys routers support bridge mode. So, before you go for Linksys router bridge mode setup, log in and check in its Internet settings if the Bridge mode is supported or not.
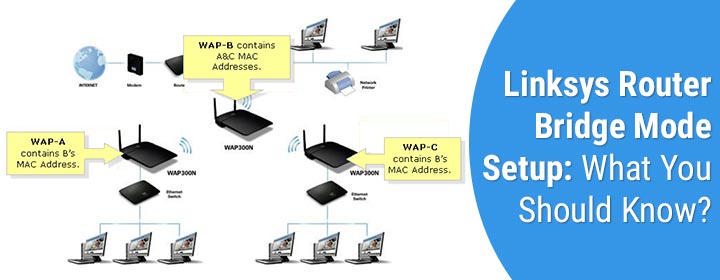
In the bridge mode, two routers connect in a way such that they act as a single network, working as a bridge. When you set up a Linksys router in this mode, some of its features will be disabled. Some features like NAT, built-in firewall, DHCP server etc will not work anymore.
This post will help you learn to get a good insight into router bridge mode and how you can set your Linksys smart router to work in bridge mode.
Before You Set Up Linksys Router in Bridge Mode
To perform Linksys router bridge mode setup, if the router supports two WiFi bands, you need to choose one wireless band to connect to the upstream router. The other WiFi band is used for wireless bridging.
If the router supports one WiFi band, then use that band for bridging. Thus only the client devices connecting via LAN can have a network connection.
After setting up the Linksys router in bridge mode, you can not remotely access the router via the Linksys app. You ought to locally connect to it.
The Linksys router will be used as an additional access point on the existing network after being set up in the bridge mode.
How to Perform Linksys Router Bridge Mode Setup?
Let us now tell you how you can complete the setup of your Linksys smart WiFi router in bridge mode. We hope you have verified if your router supports this mode of setup or not.
We also recommend configuring the Linksys router first if it is not yet set up. You simply need to access the router setup page via the IP address 192.168.1.1 and complete the setup instructions.
Once done, execute the instructions that have been highlighted next to set up Linksys router bridge mode via the Linksys router login page.
- Fetch an Ethernet cable and connect the ports (1-4) available at the back of the Linksys router to the computer.
- You do not need to connect anything to the Internet port for now.
- Now, insert the power adapter into the router and plug it into an active electrical outlet. Turn on the Power button.
- Run an internet browser now.
- In the location bar, insert 192.168.1.1 or myrouter.local. Hit the Enter key.
- Use the admin password to log in to the router.
- On the dashboard, click Connectivity under Router Settings.
- Thereafter, click on the Internet Settings tab.
- Click on edit next to Type of Internet Connection.
- From the drop-down menu, select Bridge Mode.
- Now you need to set an IP address. You have to choose from two options.
i) Obtain an IPv4 address automatically: This should be selected when you want your existing router/modem to assign an IP address to the Linksys router.
ii) Specify and IPv4 address: This option is to be selected when you wish to specify a specific IP address. You ought to enter the required information in the Internet IPv4 address, Subnet mask, Default gateway, DNS 1, 2, 3 etc. - Once you are done, click on the Apply button at the bottom of the screen.
- Click Yes on the Warning pop-up.
The Linksys smart WiFi router is now set up in bridge mode.
What Next?
A few more instructions need to be followed now:
- Use an Ethernet cable and join the Internet port of the Linksys router to the existing modem/router.
- As soon as the Linksys router detects the internet connection from the gateway, you will see a prompt on the screen “Internet Restored”. Click Yes.
- You will now be navigated to the Linksys Smart WiFi log in page. You can sign in using the Linksys Smart WiFi account.
In the End
Linksys router bridge mode setup is now complete. You can connect your client devices to its network. Also, access the interface and secure WiFi connection by customizing the settings. With the hope of providing you with sufficient information, here we sum up our piece of write-up.

