Linksys Smart WiFi Setup via Smart Setup Wizard
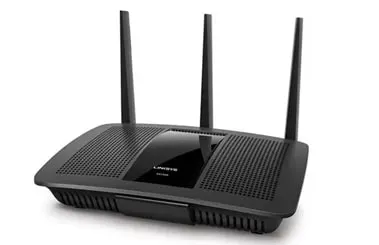
A Linksys smart WiFi router can set up using the Linksys Smart setup wizard that is embed to the firmware on the router. When the router is running on the default settings, you can use Linksys smart WiFi setup wizard to configure the router. This web page will help you carry out the setup process of the Linksys Smart WiFi routers.

How to Set up Router via Linksys Smart WiFi Setup Wizard?
- Attach the antennas to the smart router if you’ve received detachable antennas with it.
- Place the router closer to the ISP modem.
- Run a LAN cable from the Linksys router to the modem to join the two devices. Ensure making a secure connection between them.
- Plug in the Linksys router to supply power to it. Put to use the Power button located on the router to turn it on.
- The modem should powered up as well.
- Connect your computer to the Linksys router’s network now. Use the Quick Start Guide or the label below the router to find the WiFi credentials.
- A LAN cable can also be utilized to connect to the router’s network.
- Now, run an upgraded internet browser and type linksyssmartwifi.com in the address field.
- Verify the URL and press Enter. In case the URL does not help you, then use 192.168.1.1. You will be redirected to the Linksys smart WiFi setup wizard.
- On the Pop-up, select the checkbox next to “I have read and accepted the License Terms for using this software.”
- If you wish to manually configure the routerthen select Manual configuration at the bottom left corner of the screen else click Next.
- You can opt for automatic firmware updates or choose to update your router manually by selecting the right option on the next screen that appears.
- Assign a WiFi name and password for your Linksys router and click Next. You can assign separate names for different wireless bands or select Give all myWiFi bands the same name.
- Now, you will be disconnected from the router’s network. Use the updated WiFi name and password to join the WiFi again.
- Next, create an admin password for your Linksys smart router.
- Click Save and you’ll see a message “Your router is set up” prompting on the screen.
Your router is now ready to serve you with seamless internet connection throughout the home. You should access the Linksys smart WiFi login page to log in and customize the settings of the router.
Troubleshooting Linksys Smart WiFi Setup Issues
You might come across certain issues while setting up the router via the Linksys smart WiFi setup wizard. Let us help you eliminate the obstacle and carry out the setup process with ease.
- Check the connection to the router’s network. Use the correct SSID to join its WiFi on the PC. If it is a LAN connection and then ensure to make a secure connection using a damage free cable.
- Make sure that you are using the power adapter that came with the router to supply power to it.
- The power connection to the router and modem should be consistent and fluctuation free.
- Use a good LAN cable to link the Linksys router to the modem. We recommend using a CAT 6 cable.
- Use up-to-date internet browser and clear the cache from it before setting up your router using Linksys smart WiFi setup wizard.
- Disable any VPN or firewall that may block the router login.
Are you Still Stuck with Linksys Setup? Try This!
1. Reboot and Retry
Perform a simple reboot by unplugging the router from the wall outlet for some time. Also, do the same with the modem. After about 5 minutes, turn on the modem and then the router. Following the same sequence is suggest and give a gap of about 2 minutes in between each step that you perform. Connect your PC to the router’s network and go to the Linksys smart WiFi setup wizard to perform its setup.
2. Perform a Reset
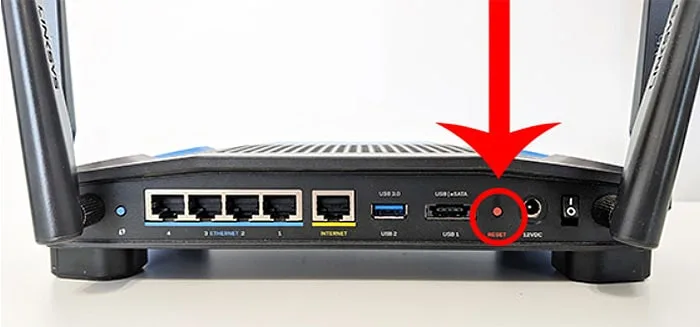
If the router still can’t set up, then press the Reset button using a sharp object. Hold it for about 10 seconds. This resets your router to the default values. Now, try setting up the router from scratch.

After you have configured your router using the Linksys Smart WiFisetup wizard, go ahead and begin using its internet connection.

