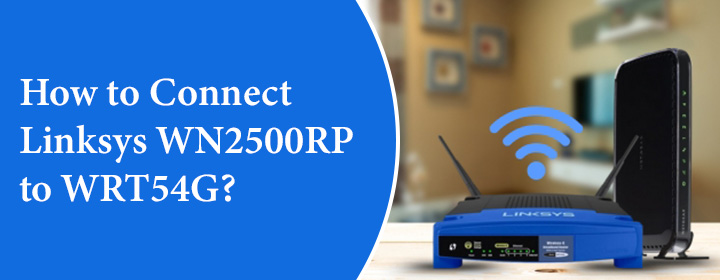
How to Connect Linksys WN2500RP to WRT54G?
Have a Linksys WRT54G Aster and bought a Linksys WN2500RP WiFi extender to boost the Aster’s signals? Although these two gadgets are different technical inventions, it is entirely possible to connect them. It just requires a bit of manual work and a write-up on how they talk to each other.
Before You Start: Quick Reality Check
Before diving in, make sure you’ve got everything ready. Here’s a mini checklist:
- Your Linksys WRT54G router is already set up and working.
- You’ve got a Linksys WN2500RP N600 Dual-Band Range Extender in hand.
- A laptop or PC that can connect to WiFi or Ethernet.
- Patience. (Yes, really. Some of this setup can get fussy.)
Also worth noting: WRT54G is a legendary router, but it runs on old technology. It runs on 2.4GHz and doesn’t support modern dual-band or high-speed standards. That’s not a deal-breaker—it just means your expectations should match what the hardware can realistically do.
Step 1: Set Up the WRT54G Router
If your WRT54G is alive and working, you can skip this step. But if you’re dusting it off from a drawer, here’s a quick reminder:
- Plug the router into a power source and connect it to your modem using an Ethernet cable.
- Connect your PC/laptop to the WRT54G via WiFi or Ethernet.
- Go to your browser and type 192.168.1.1 into the address bar.
- Log in. Default username is blank (just leave it empty), and the default password is admin.
- Set your SSID (WiFi network name) and security settings. Use WPA2-Personal if available.
You’re basically just making sure you have configure all router settings through Linksys router login interface. Now you should check the internet is working or not on your internet device.
Step 2: Understand the Connection Type — It’s Not Plug-and-Play
Here’s where it gets real: The WN2500RP doesn’t directly “pair” with the WRT54G like a Bluetooth speaker. It extends an existing WiFi network, but since the WRT54G only supports 2.4GHz, and the WN2500RP is dual-band, you need to make sure the extender connects to that 2.4GHz signal.
You’re not bridging Ethernet here; you’re repeating a wireless signal.
Step 3: Connect Your PC to the WN2500RP
- Plug in the WN2500RP to a power outlet halfway between your WRT54G and the area with weak signal.
- Wait for the power light to go solid.
- On your computer, scan for available WiFi networks. You should see something like Linksys Extender Setup or similar.
- Connect to it.
Step 4: Access the WN2500RP Setup Page
Once connected to the extender’s temporary network:
- Open a browser and type http://extender.linksys.com or 192.168.1.1 (if the first doesn’t work).
- You’ll land on the setup interface. Follow the on-screen instructions.
- When prompted, select your WRT54G’s WiFi network from the list.
- Enter the WiFi password you set on the WRT54G earlier.
- Continue following the prompts. The WN2500RP will now try to connect to your router.
Step 5: Final Setup and Placement
After the connection is complete:
- You’ll be asked to set an SSID for the extender. You can either keep the same network name (for seamless roaming) or set a different one (like “MyWiFi_EXT”).
- Check the signal strength. If it’s weak, move the extender closer to the router.
- Save all settings and reboot both devices if needed.
Essentially, you are building a wireless bridge increasing the signal range of your WRT54G by means of the WN2500RP acting as a repeater.
Troubleshooting Tips
If things aren’t working as expected, don’t sweat it. Here are a few common hiccups and how to fix them:
- Extender won’t connect? Double-check your WRT54G’s wireless settings. Make sure SSID broadcast is enabled, and you’re not using WEP (it’s outdated and may cause compatibility issues).
- Getting booted offline randomly? Try changing the WiFi channel on your WRT54G to something less crowded, like channel 1, 6, or 11.
- No internet after setup? Reboot both the router and the extender. That usually kicks things into gear.
Conclusion
Linking Linksys WN2500RP extender to WRT54G WiFi router might not be as simple as newer plug-and-play setups. But it’s totally doable thing with a little effort. You’re giving your old gear a second wind and saving money while at it. Just keep in mind that speeds will be limited by the WRT54G’s capabilities. But if all you need is decent coverage for emails, browsing, or even some light streaming, this setup works just fine.
FAQs
1. How to Change Linksys Extender WiFi Password?
Ans. Access the Linksys app or extender.linksys.com through the admin username and password. Go into the settings and select the Wireless Settings. choose the SSID and enter the password. Then you can SAVE it to apply.
2. How to Access Linksys Extender Interface?
Ans. You may reach the Linksys extender interface in two ways: one is extender.linksys.com and the other is 192.168.1.1. Use the admin username and password (default one) inscribed on the rear label of the extender or in the user manual to log in.
3. How to Manage the Extender through Linksys App?
Ans. Yes, you can manage the Linksys WiFi extender settings through your phone (Linksys app). To access the app, you have to use the admin credentials or your Email address. If you don’t have any account for app, create it by taping Sign Up option.

